 PixRinse
Screenshots show the English app. Preset names and controls are also available in your app language.
Your starting point
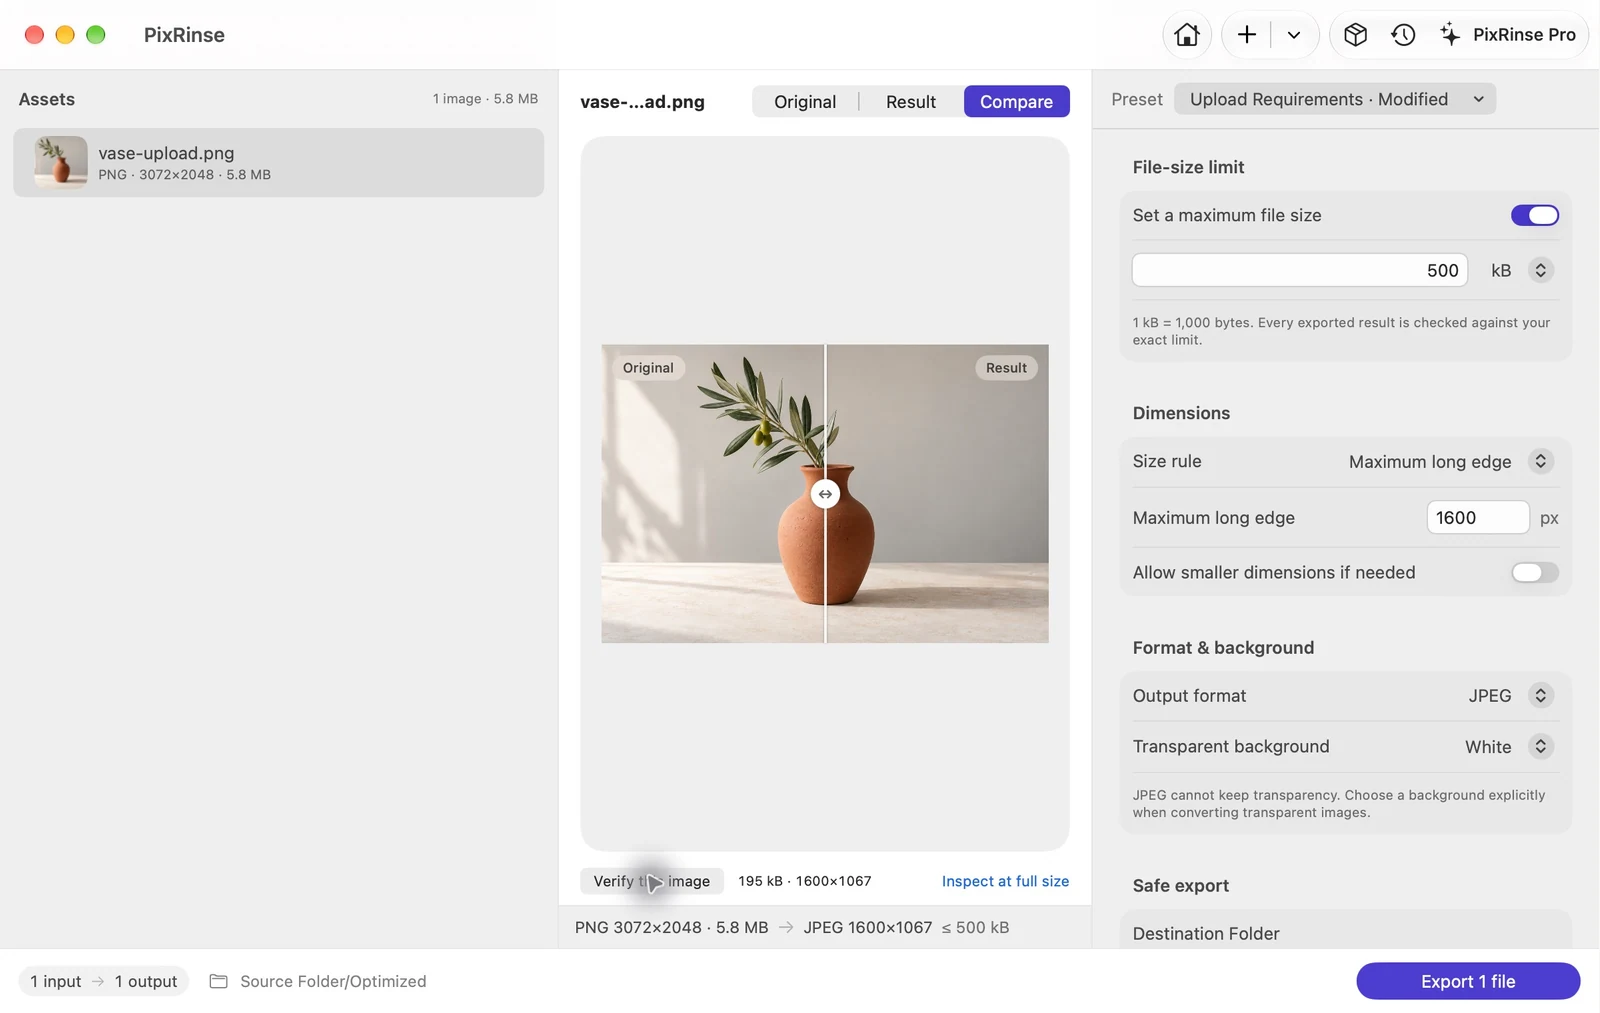
Use Upload Requirements in PixRinse, then review these settings against your actual destination.
| Output | JPEG |
|---|---|
| Maximum file size | 500 kB (500,000 bytes) |
| Long edge | 1600 px, downscale only |
| Metadata | Remove sensitive metadata |
| Background in this example | White |
How to do it
Read the upload rules
Check the accepted format, maximum bytes, dimensions and any minimum resolution. A file-size limit alone does not describe every requirement.
Choose Upload Requirements
Add your images and select the built-in preset. Its starting point is JPEG, a 500 kB cap and a 1600 px long edge. Change these to match the actual destination.
Check the preview
Inspect text, faces and edges. If a transparent image needs JPEG, explicitly choose an appropriate background before exporting.
Export and inspect the outcome
Export copies, then check each file’s validation result. A requirement that cannot be met should be resolved before you upload; it is not a successful delivery.
THE FILES FROM THIS WALKTHROUGH
What this example produced
A 5.8 MB PNG becomes a 195,385-byte JPEG at 1600 × 1067. The original stays in its source folder.
- Maximum bytes
- 500,000
- Actual bytes
- 195,385
- Background
- White
| File | Format | Pixels | Bytes |
|---|---|---|---|
| vase-upload.jpg | JPEG | 1600 × 1067 | 195,385 |
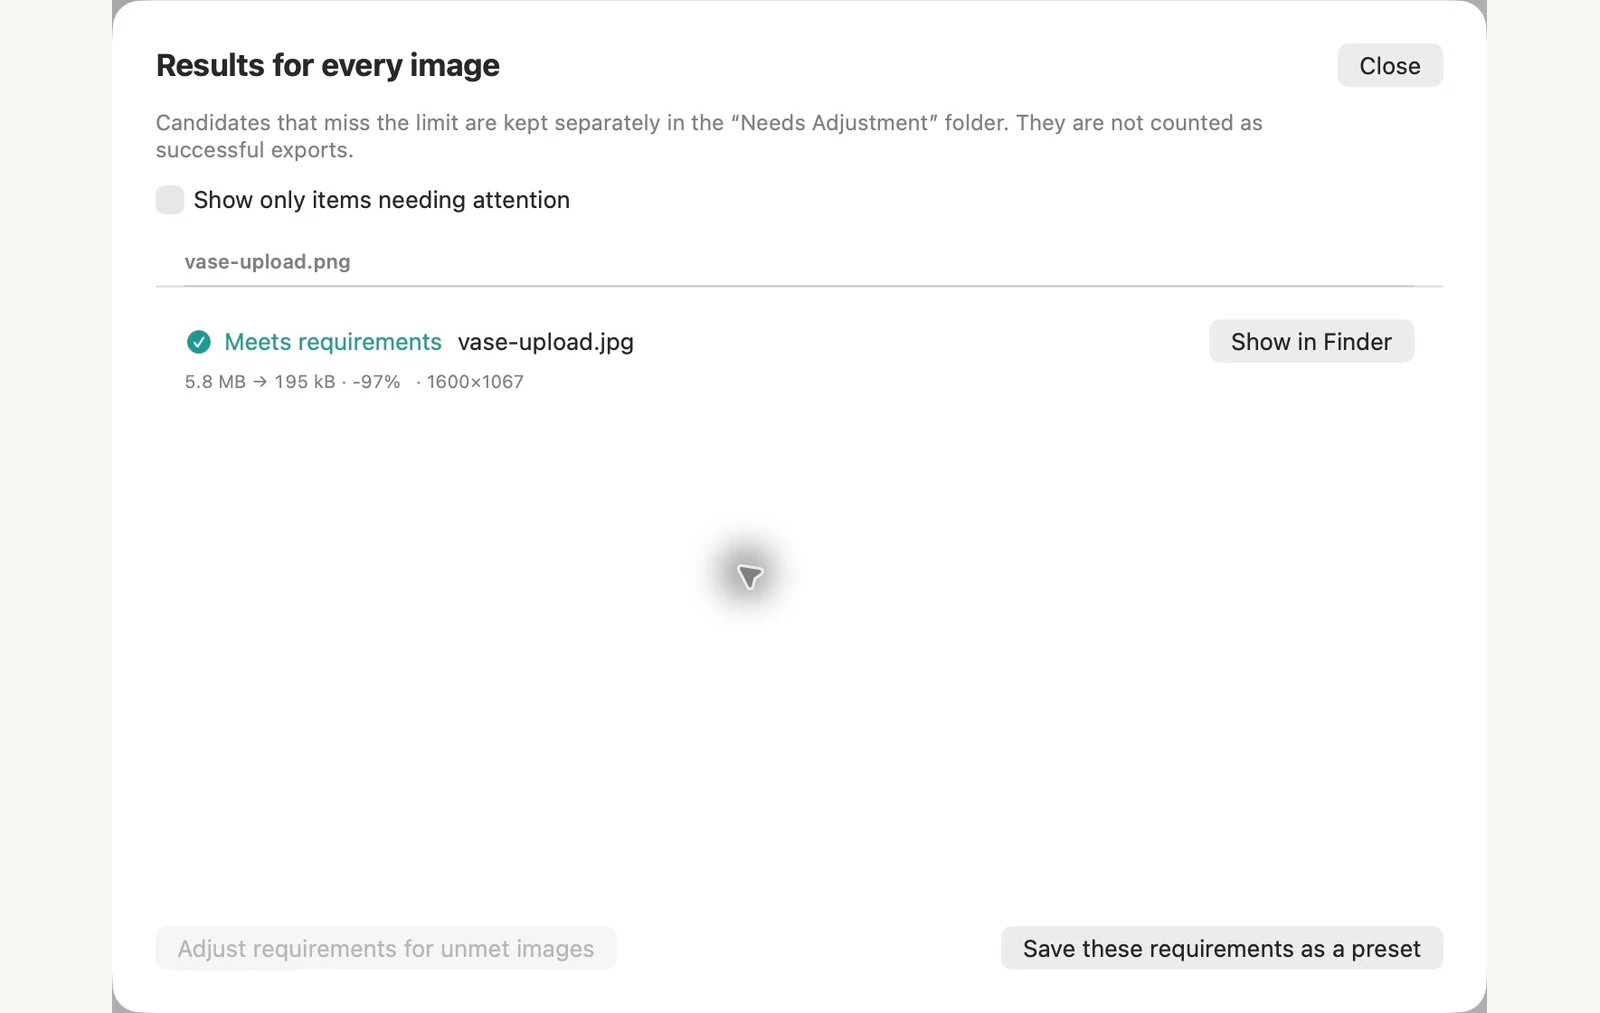
Measured on the sample files shown. Your results depend on your originals and settings. The ceramic-vase photograph is an AI-generated sample. The app screenshots and exported file measurements are real.
ALREADY ON YOUR MAC
Get an image under 500 KB with Preview
You don’t need another app to meet an upload limit once. Preview can export a smaller JPEG, as long as you’re happy to adjust it by hand.
Lower the quality
Open the image in Preview and choose File > Export. Set Format to JPEG and move the Quality slider. The File Size estimate updates as you go, so stop once it is safely under the limit, then save.
Reduce the dimensions if you need to
If the image looks poor before it fits, make a copy, open the copy and choose Tools > Adjust Size. Enter smaller dimensions, click OK, then export as above. Saving after Adjust Size changes the file you opened, which is why you start with a copy.
Where the built-in route stops
- You can’t ask for “under 500 KB”. You move the slider and read the estimate, one image at a time. A batch export applies one Quality setting to every selected image, so some may land over the limit while others end up smaller than they needed to be.
- The estimate is not a check. Look at the saved file’s size before you upload it.
- Preview’s export kept GPS location and other metadata in our test, and it has no metadata option. That matters if the upload will be public.
PixRinse is a better fit when many images must meet the same limit, or when you want each result checked. Set the maximum size and dimensions once, export copies, and see which files did not meet the requirement. If your files only need lossless optimisation, see how PixRinse compares with ImageOptim.
Tested on macOS 27 in November 2026 with sample images. Menu names can differ on other versions, and results depend on your files. Choosing between apps? Compare Mac image compressors.
A couple of common questions
Will PixRinse always reach 500 KB?
Some images cannot meet a strict byte limit while retaining the requested dimensions and quality. Review the reported result and adjust the requirements deliberately.
Can I use 200 KB or 1 MB instead?
Yes. Edit the maximum file size and unit. Keep the destination’s format and minimum dimensions in mind.
Put the workflow to work.
Open PixRinse, add a few images and start with the settings above.
Download for MacFree: up to 10 images per batch and one output per source. Compare Free & Pro.