 PixRinse
Screenshots show the English app. Preset names and controls are also available in your app language.
Your starting point
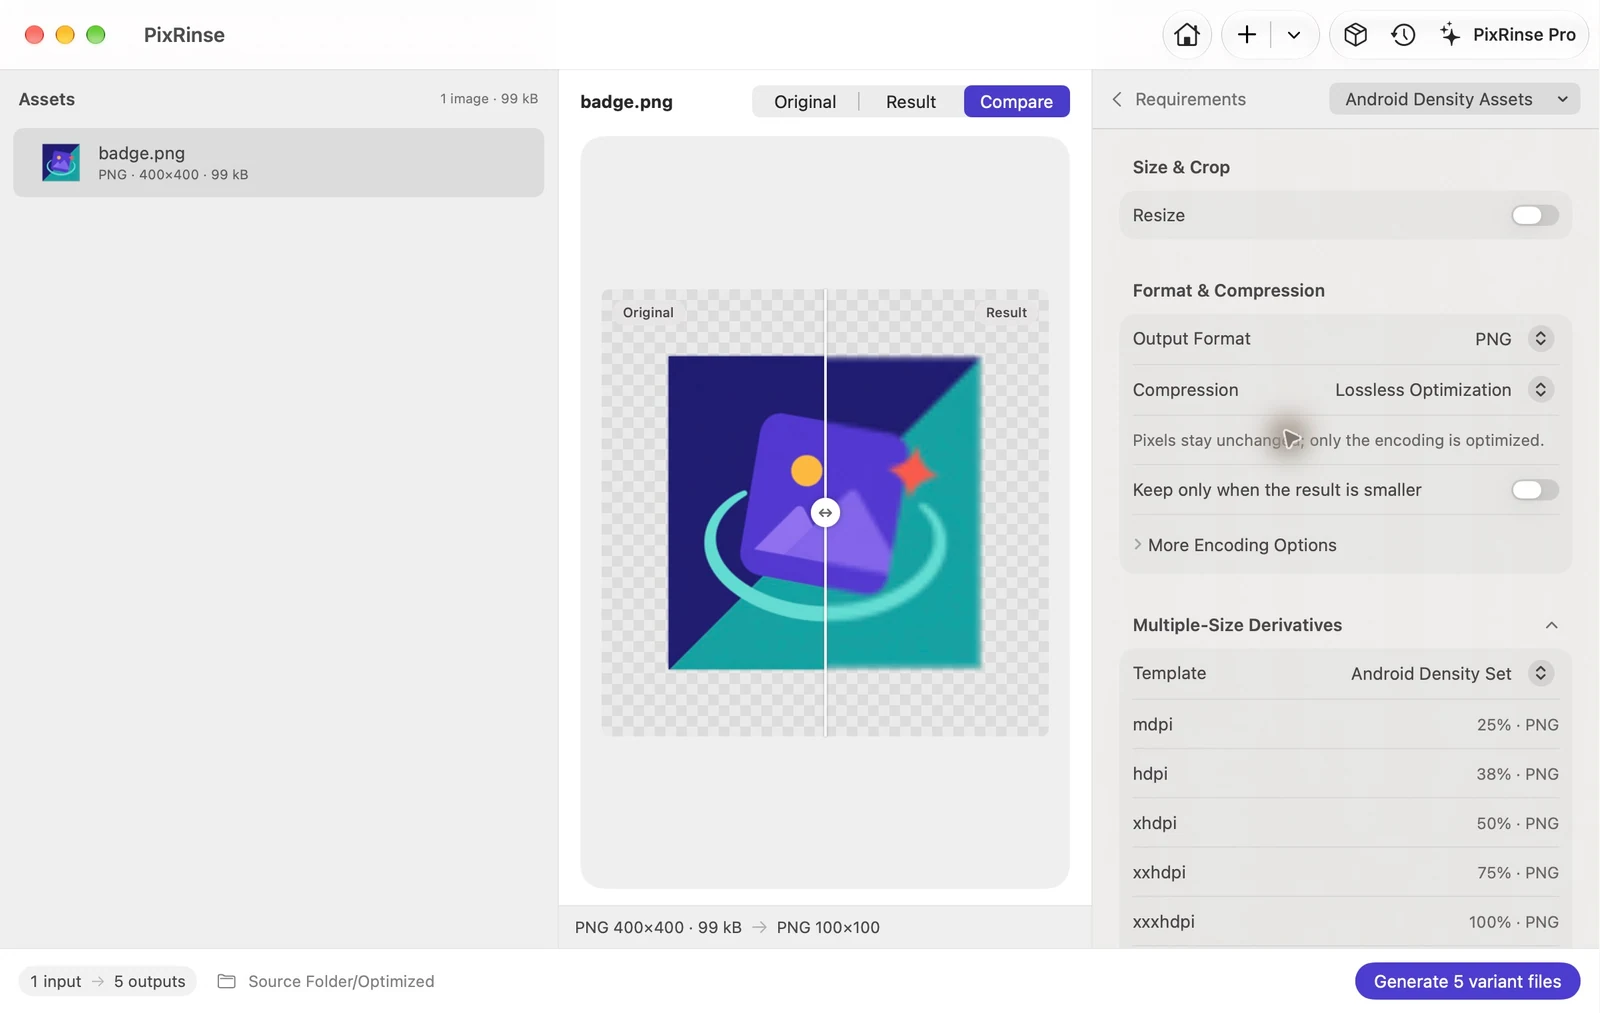
Use Android Density Assets in PixRinse, then review these settings against your actual destination.
| Source convention | Original represents xxxhdpi |
|---|---|
| Buckets | mdpi / hdpi / xhdpi / xxhdpi / xxxhdpi |
| Scales | 25% / 37.5% / 50% / 75% / 100% |
| Output | PNG in drawable-* folders |
How to do it
Choose an xxxhdpi source
For example, a 400 × 400 px source yields a 100 × 100 px mdpi version. Use a suitably detailed original and check expected rounding.
Select Android Density Assets
Review the five planned outputs and the drawable folder names. Each size is derived independently from the source.
Check names and transparent edges
Choose a resource name compatible with your Android project. Inspect the PNG result at the smaller densities.
Export and integrate into res
Copy the generated drawable folders into your Android resources and verify the result in the application.
THE FILES FROM THIS WALKTHROUGH
What this example produced
A 400 × 400 transparent PNG represents xxxhdpi. The hdpi file is 150 × 150: exactly 37.5% of the source. The app rounds that percentage to 38% in its compact label.
- Density folders
- drawable-mdpi through drawable-xxxhdpi
- Square sizes
- 100 / 150 / 200 / 300 / 400 px
- Transparency
- Retained
| File | Format | Pixels | Bytes |
|---|---|---|---|
| drawable-xhdpi/badge.png | PNG | 200 × 200 | 18,463 |
| drawable-xxhdpi/badge.png | PNG | 300 × 300 | 41,256 |
| drawable-hdpi/badge.png | PNG | 150 × 150 | 11,674 |
| drawable-mdpi/badge.png | PNG | 100 × 100 | 6,277 |
| drawable-xxxhdpi/badge.png | PNG | 400 × 400 | 65,237 |
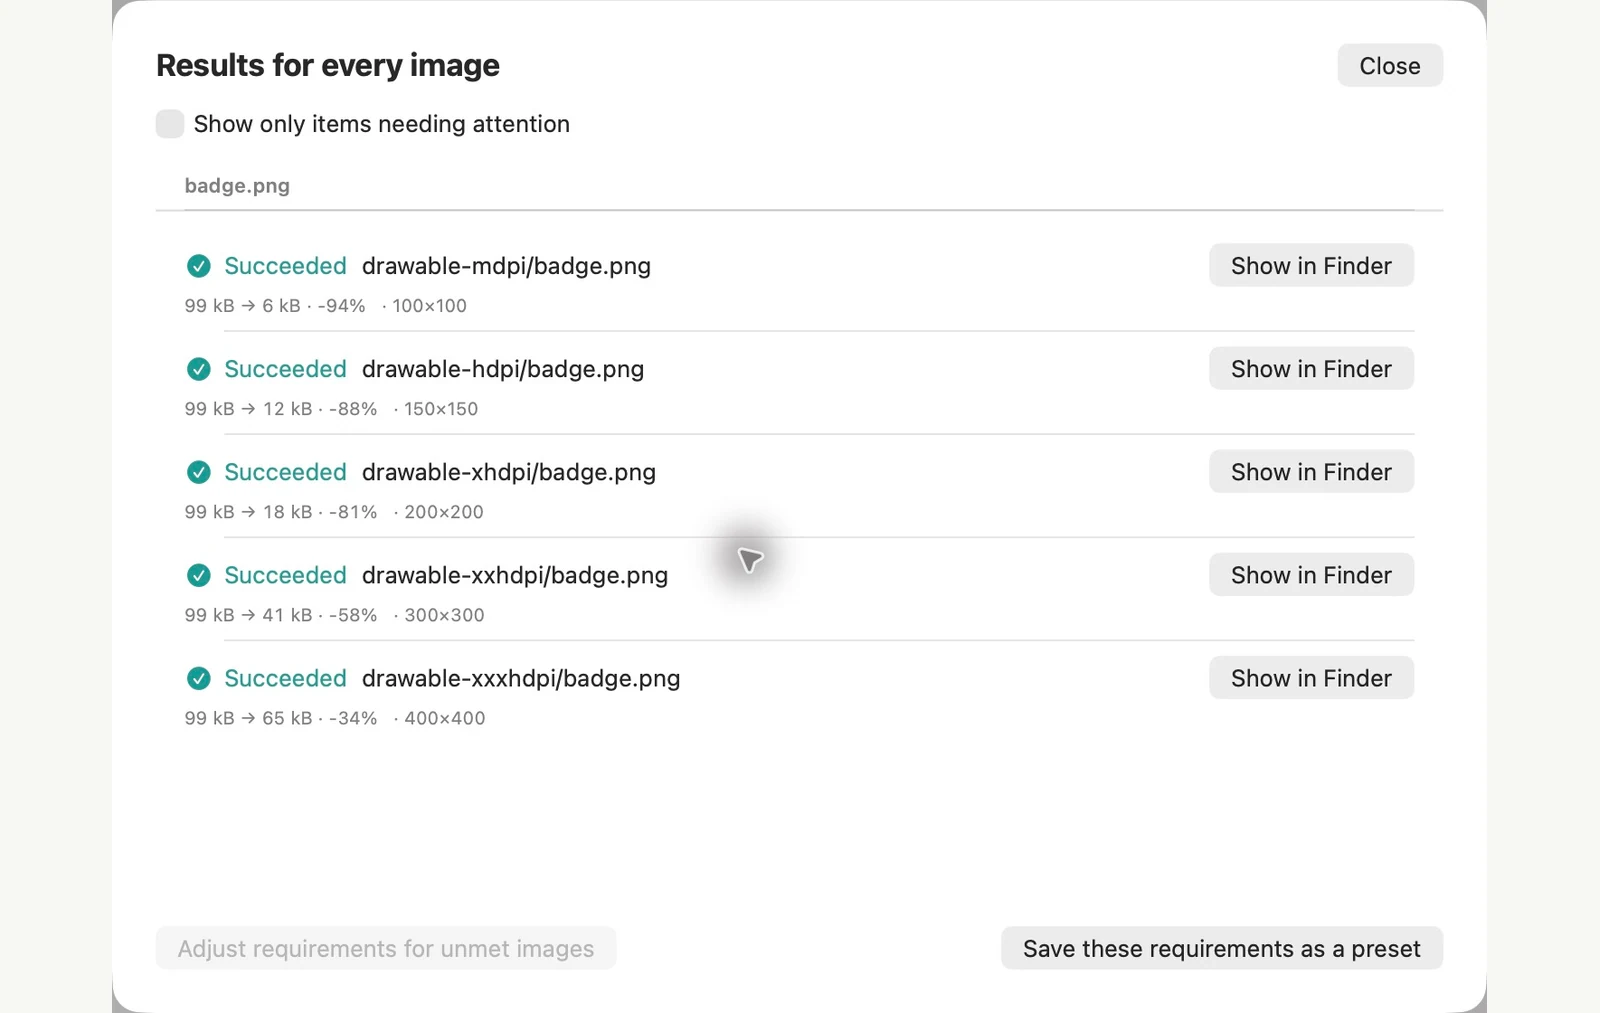
Measured on the sample files shown. Your results depend on your originals and settings. This walkthrough uses owned PixRinse artwork on square or transparent sample canvases.
A couple of common questions
Can I use an mdpi source?
The built-in template assumes xxxhdpi. Use a larger original or configure custom variants for your actual source convention.
Is transparency preserved?
The preset uses PNG, which supports alpha. Review the source and output edges before shipping.
Put the workflow to work.
Open PixRinse, add a few images and start with the settings above.
Download for MacFree: up to 10 images per batch and one output per source. This workflow’s multiple outputs require Pro. Compare Free & Pro.