 PixRinse
Screenshots show the English app. Preset names and controls are also available in your app language.
Your starting point
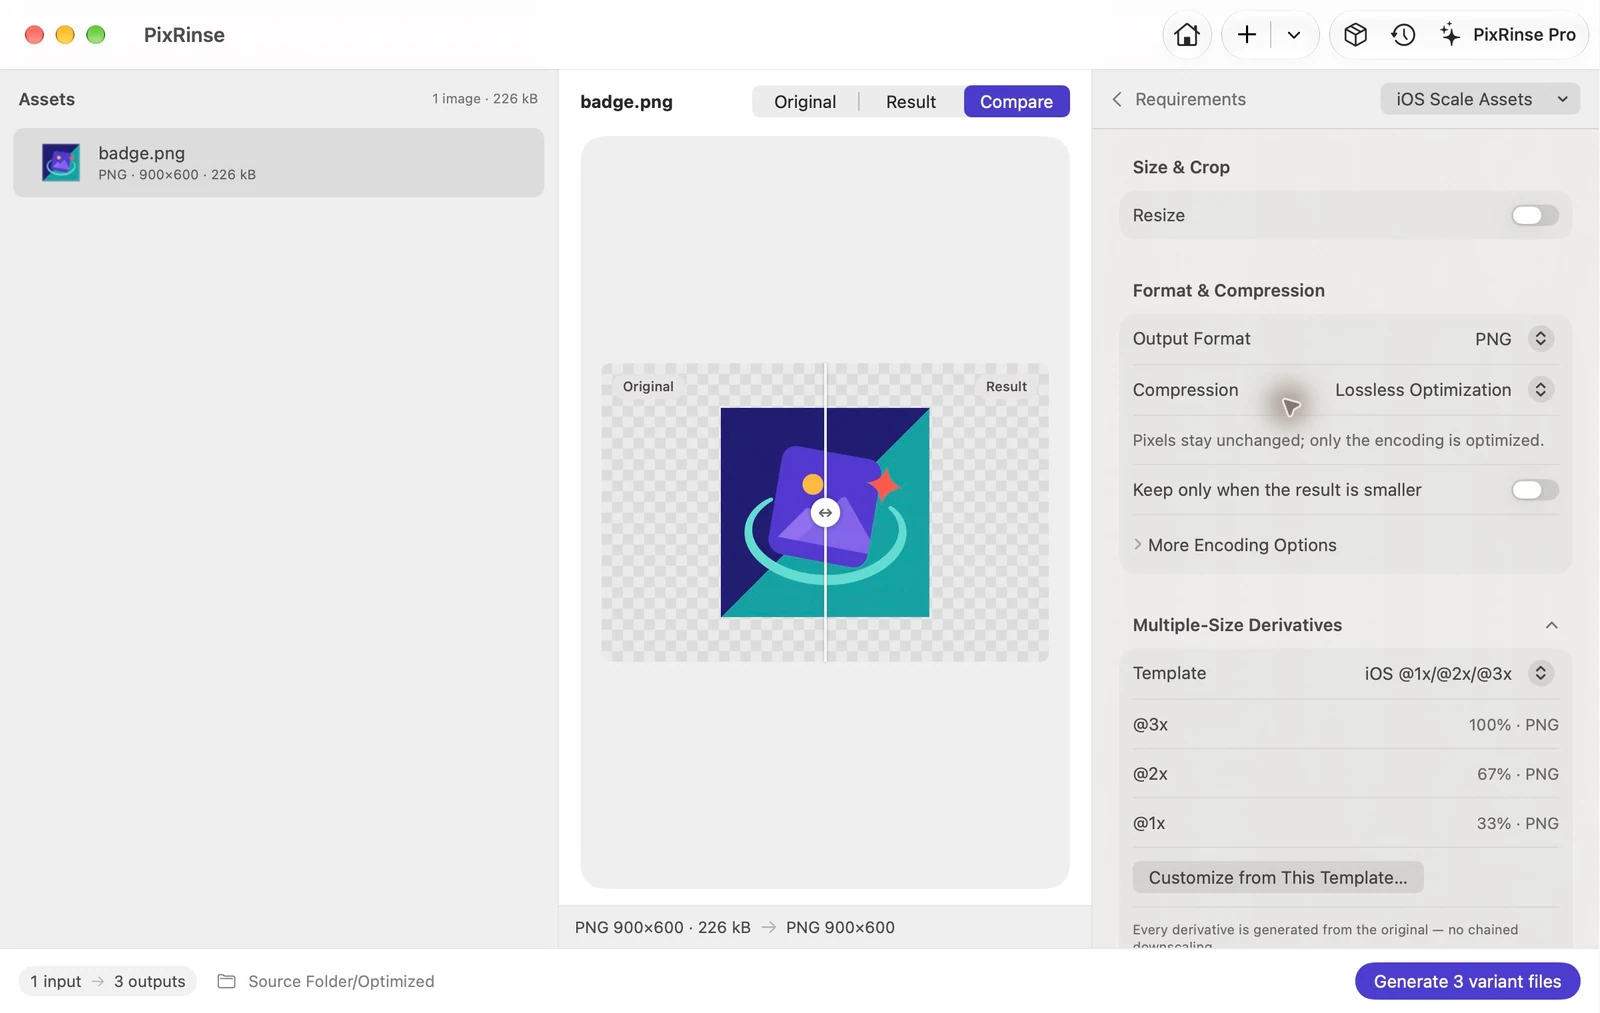
Use iOS Scale Assets in PixRinse, then review these settings against your actual destination.
| Source convention | Original represents @3x |
|---|---|
| @3x | 100% of the source |
| @2x | ⅔ of the source |
| @1x | ⅓ of the source |
How to do it
Prepare a clean @3x source
A 900 × 600 px source represents a 300 × 200 pt image at @3x. Prefer dimensions divisible by three to avoid ambiguous rounding.
Select iOS Scale Assets
Review the three PNG outputs. The preset names the full-size file @3x, the two-thirds file @2x and the one-third file without a scale suffix.
Inspect transparency and dimensions
Check fine strokes at each scale. The original must contain enough detail; the preset does not redraw icons or make vector artwork.
Export and add to Xcode
Place each file in the matching scale slot of your image asset. This is an image scale set, not a complete AppIcon catalog.
THE FILES FROM THIS WALKTHROUGH
What this example produced
The source is a 900 × 600 transparent PNG representing @3x. It produces the three sizes below. The @3x export retains the original decoded pixels and alpha.
- @3x
- 900 × 600
- @2x
- 600 × 400
- @1x
- 300 × 200
- Transparency
- Retained
| File | Format | Pixels | Bytes |
|---|---|---|---|
| badge.png | PNG | 300 × 200 | 20,079 |
| badge@2x.png | PNG | 600 × 400 | 74,319 |
| badge@3x.png | PNG | 900 × 600 | 149,961 |
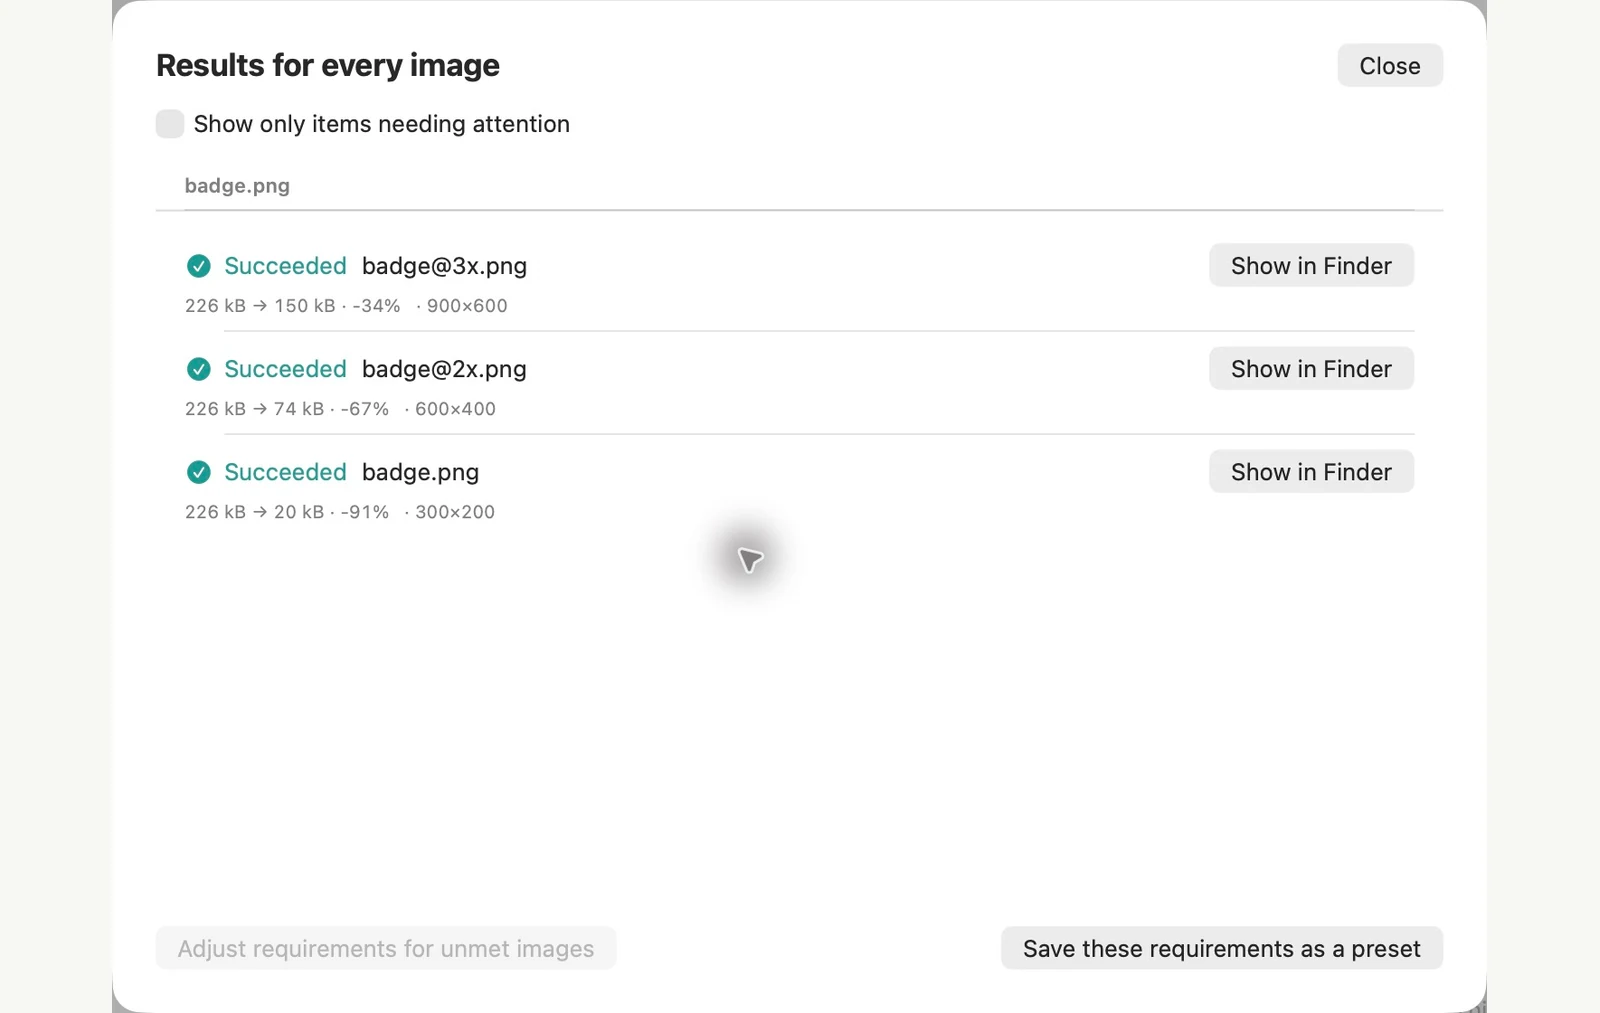
Measured on the sample files shown. Your results depend on your originals and settings. This walkthrough uses owned PixRinse artwork on square or transparent sample canvases.
A couple of common questions
Are the small images resized from each other?
No. Every derivative comes directly from the original.
Does it generate Assets.xcassets?
It exports named PNG files. Add them to the appropriate asset catalog slots in Xcode.
Put the workflow to work.
Open PixRinse, add a few images and start with the settings above.
Download for MacFree: up to 10 images per batch and one output per source. This workflow’s multiple outputs require Pro. Compare Free & Pro.